How to obuild a digital exhibition for your museum or heritage site, part 1 of 3
Whether you’ve closed doors for the latest COVID variant or simply need a digital companion to your physical exhibition, this is a guide to getting started with publishing a digital exhibition as a part of your digital strategy at your museum or heritage site, archaeological project, or other archive.
The good news is that you’ve never had better tools available for publishing your digital exhibition.
To get oriented with this guide, here’s an overview of the series so far:
- Getting Started (You are here)
- Building your database
- Building a compelling narrative out of your exhibition
- Tips for Creating Great Online Exhibitions
Example exhibition from our partners at Harvard’s Giza Project: https://giza.mused.org/
Onward to getting started building your digital exhibition!
Getting started
Getting started building a digital exhibition standalone or integrated with a physical one shares a lot in common with creating a physical exhibition. So if you’re a curator working on presenting your collection in digital form and have experience building exhibitions or if you’re a professor working on a small collection, you can use the same concepts from either building your own exhibitions or ideas from exhibitions that you’ve liked visiting to start building your digital exhibition and community around your collection.
This is an overview of a process that you could use to build your digital exhibition and start planning how it might fit into your digital strategy. This will go straight to the planning and making the exhibition, but future blog posts will discuss grantwriting, project management, digital strategy, and other earlier stages.
Step #1: Initial summary of project
When you’re just starting out, you might have an idea of what you want the exhibition to include or what themes you want to develop, and one good first step if you haven’t done it yet is to pull this out of the aether into a 2-3 sentences somewhere.
This doesn’t need to be conclusive, and likely may be revised in future iterations of the project, but can serve as an anchor while you start gathering ideas and content for your exhibition.
For example, if you were writing an exhibition about the Villa Romana del Casale, you could write something as basic as the following:
Tell the history of the Villa and its recent conservation efforts using 3d materials. Provide interpretative materials telling the narratives in the mosaics as an informative and interesting way to learn both Roman mythology and the archaeology of Sicily.
Then when adding the content of your exhibition, this central idea or narrative can guide the process of creation and developing themes.
During this phase, you might not need to necessarily consider your audience visitors too closely yet–rather, what track what your initial motivation and interest is. In later stages, you’ll identify main shared characteristics of visitors that you’re hoping to reach with your digital exhibition and look at how to make the content relevant to them.
Step #2: Surveying Content
A great way to get started thinking about building your digital exhibition is to make a list of what content you have: what artifacts do you want to feature, what spaces do you want to include, and what stories do you have to tell?
For example, when we get started building digital exhibitions, we often times make a list on a piece of paper or whiteboard somewhere of the content that the project has and from there contrast the content against the learning goals, audience, and major themes of exhibition that we brought to the planning session. Often times looking at the content together on a whiteboard will spark new ideas for the exhibition and new major themes and stories to include.
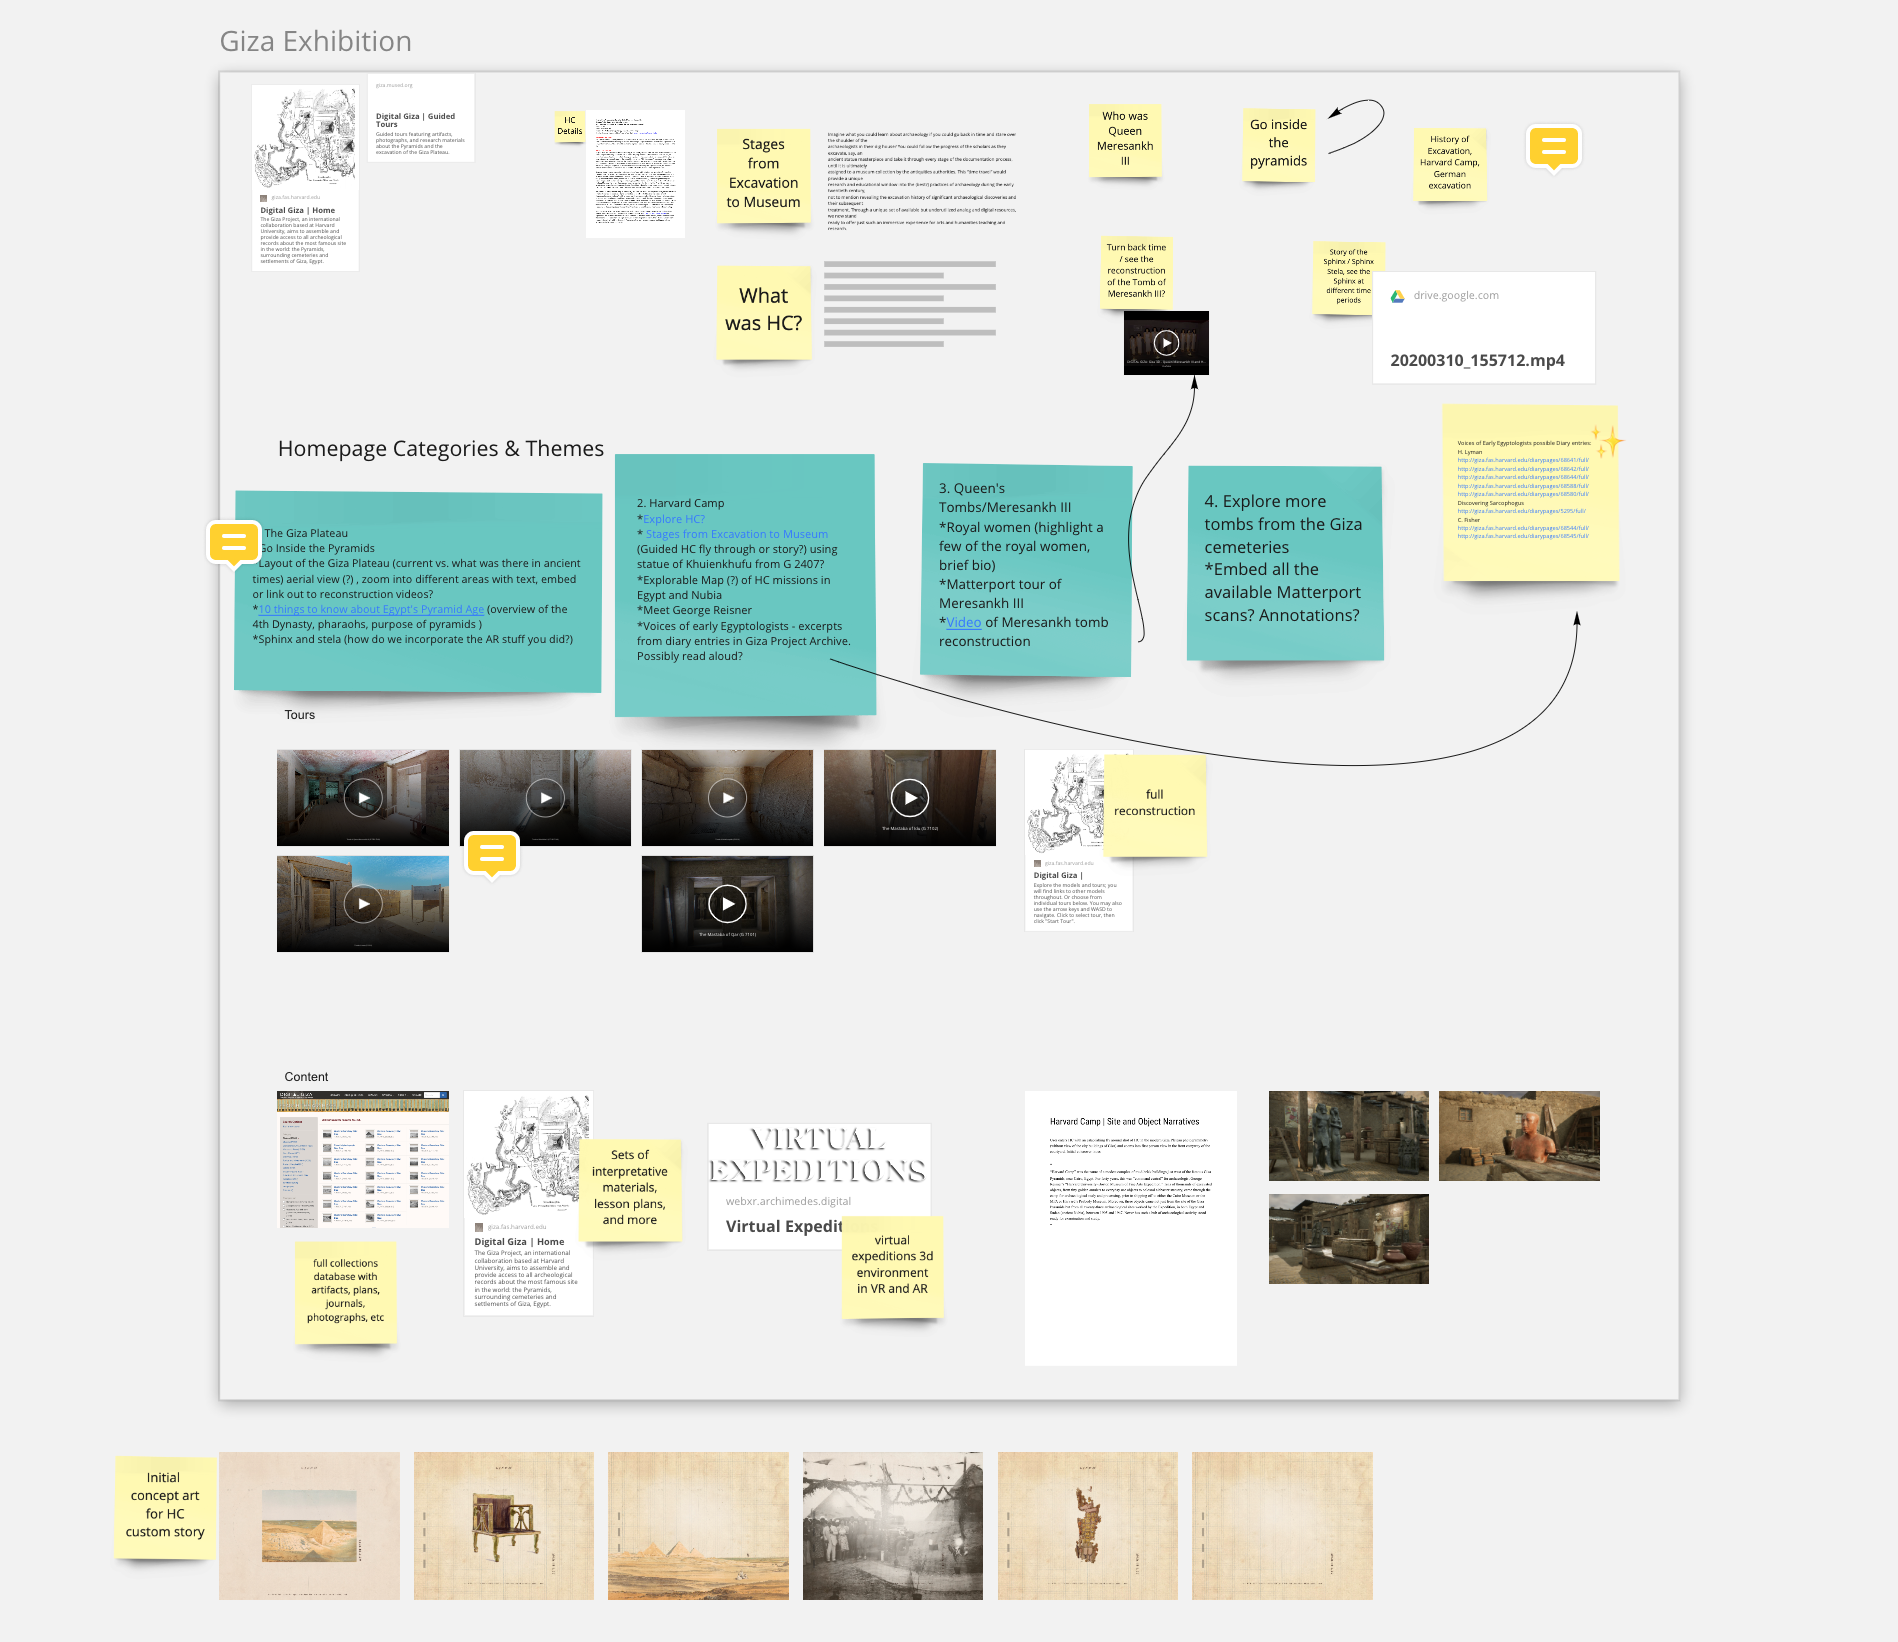
Putting everything in a Word doc or something else shared works also!
Planning for data capture and requesting rights
During this phase and the following, you can also identify content that you want to capture, generate, or request the rights to. It might be worthwhile to include this on your list of content as you’re planning your digital exhibition so that you can start to conceive of the exhibition narrative as a whole.
If you’re interested in including a virtual tour of your physical space, you might at this point reach out to the Matterport Capture Services team to schedule 3d scanning of your space or reach out to us at [email protected] to talk about options for 3d scanning your space.
Also for example, often times we capture extra video of museums and heritage sites to include in the interactive storytelling published with each exhibition. Even simple pans and zooms of your spaces and interesting artifacts can go a long way in building digital narratives for your exhibition but are rarely already created for the exhibition. Part of this process is understanding also what should be captured in the field when possible. For an example, check out the background videos used in digital narratives like Snowfall by the New York Times and others in the blog about Visual Storytelling.
A good example of this also is the excellent background video on the Theban Mapping Project website homepage.
This type of video is not difficult to produce and provides visitors an overview and introduction to the project better than any single image is able.
.jpg)
Step #3: Determining goals and audience
After you’ve drafted your initial idea and looked at a survey of the content that you’re creating, a next step can be to define the goals for your digital exhibition, both educational and experiential, and the main characteristics of the audience that you’d like to visit your digital exhibition.
First, with the goals, we commonly identify two type of goals that you might develop: educational and experiential. The first type, an educational goal, is a goal for your audience to learn something about your collection. For example, an educational goal about the archaeological site of Copan may be to have your visitors understand how archaeologists tunnel into the pyramid structures to understand phasing of the temples at Copan.

The second, an experiential goal, is a goal to share a certain experience for your audience. For example a goal for your audience may be to enter the tomb of Queen Meresankh III with Matterport and see the paintings of Meresankh and her mother Hetepheres and rock-cut statues.
When you’re looking at the survey of your content, you can ask yourself what educational or experiential outcomes do you want to create from your exhibition? What is the most essential information that you want your visitor to learn and experience and what are the interesting details that they shouldn’t miss out on?
After you identify a few of your major goals with your exhibition, you can start building out your exhibition’s major themes and stories.
Defining your audience for your digital exhibition
Defining your audience is deeply important to your process, and often times overlooked in favor of more focus on content. A better grasp on the type of visitor that you’re trying to reach will help you write better walltext and item descriptions and transform your storytelling for your exhibition. Additionally, identifying where your audience likes to hang out online will help you identify what marketing channels you need to distribute your exhibition on.
For example, if your audience commonly frequents the websites Hyperallergic, you know that you might be able to find a way to discuss your exhibition there with a feature or other type of cross promotion. You could potentially do a Sponsored Post on Hyperallergic by getting in touch with them here: https://nectarads.com/products/
If you haven’t gotten started community-building around your collection, there’s no better time than the present to start a social media account and begin talking about what’s been happening with your collection to the public. These ideas and more are detailed in “Community Building Tools for Museums and Heritage Sites” for some helps getting off the ground.

If you already have an existing audience, you can use tools to study which sites they frequent the most and what types of content will appeal to them. Will they more like to see interactive image annotations and data visualizations or will they want to dive deep into long-form narrative pieces? Will they want to explore a virtual tour of a space or will they want to browse and discover artifacts with the search tools?
Many exhibitions get this far and state that their tiers of audience visitors are something like the following:
- Researchers that are interested in the content and using it for teaching and writing
- Students that are studying the subject of the exhibition
- The general public lifelong learner and National Geographic reader
This is fine but perhaps undersells the value of the third type of user: more often, the researcher will want to ask hard questions of the data, but those might translate into very complicated feature requests of the search tools to run some queries on the dataset a few times for their research–possibly a better task for a research database than a digital exhibition. The general public user, however, is more likely to continue to invest time and energy into learning about the archive, exploring all the content, and doing important things like attending live events (and even possibly donating if you are accepting donations).
Even if you don’t have live events, donations, or any other community interactivity, you can’t understate the importance of the general public life-long learner interested in your exhibition. In practice, the digital exhibitions and collections that make specific effort to foster and build communities of these life-long learner types are the longest lived, most built out, and generally have the easiest time finding funding.
Step #4: Developing Major Themes and Storytelling
Finally, when you’re planning out your exhibition, after identifying key educational and experiential goals, you can start to put together major themes that you want to feature and narratives that you’d like to build from your collection.
The themes and narratives in your exhibition are essential to the experience of your exhibition through a web browser: otherwise visitors will be lost in a relatively impenetrable wall of faceted search tools and lists of artifacts that they don’t have context for.
Some curators call this the “stumble upon” experience that’s missing in from the digital exhibitions (i.e. serendipitously discovering new works by having to walk through other galleries to the one that a visitor is interested in). But you can design for this in your exhibition, taking advantage of the digital medium, by featuring major themes and stories on your homepage that provide a bit more serendipitous in-roads into your collections.
A good example of this is the homepage of the Saint Catherine’s exhibition on Mused: many major themes and topics provide interactive pathways into exploring the data of the collection and the virtual tours of the museum and sacred places.

Get inspired from these examples
After you’ve identified your major themes and come up with story ideas, you’re ready to start getting creative writing your stories and building content! We’ll cover these steps in the next blog posts in this series. In the meantime, you can get inspired from some exhibitions that inspire us from the community.
Do you have an exhibition that inspires you and that you’d like to feature here? Reach out in the comments and let us know!
Next up in the series on digital exhibition creation is getting started building your exhibition with a real database and creating a homepage and item/artifact records. If you have other requests or questions, don’t hestitate to respond in the comments!
Keep reading Part #2 of the series, Building your database.
Overview of the series so far:
- Getting Started (You are here)
- Building your database
- Building a compelling narrative out of your exhibition
- Tips for Creating Great Online Exhibitions
Example exhibition from our partners at Harvard’s Giza Project: https://giza.mused.org/
That’s all for now, GLAM-orous people! Please respond with comments about your own experiences and what’s worked for you. And this article will be updated regularly with more resources and examples as they emerge.
If this article was useful to you or inspiring in any way, please sign up ✨ by entering your email ? at the bottom of this page, and more fascinating winged words composing GLAM-tech blog posts will arrive to your inbox.
1 Comment
Comments are closed.
Related Posts
An Overview of Digital Collections and Exhibitions Platforms
[Updated 10 March for 2022: For a full overview and interactive demos,
From Stone to Silicon in Ancient Assyria
In ancient Nineveh, 2,600 years ago, you arrive from a long journey to
Comparing Search Interfaces on Digital Exhibitions
For digital exhibitions at museums and heritage sites, the search func
Tips for Creating Great Online Exhibitions
If you’ve been following the three part series on how to build a dig
How to build a digital exhibition for your museum or heritage site in 2022: Telling your collection’s story, part 3 of 3
We saved the best for last: building a compelling narrative out of you
How to: Building your database
How to build a digital exhibition for your museum or heritage site, pa
Pingback: Tips for Creating Great Online Exhibitions – Mused